doyouremember.com
King Charles’ Health Takes Turn For The Worse As Cancer Battle Persists
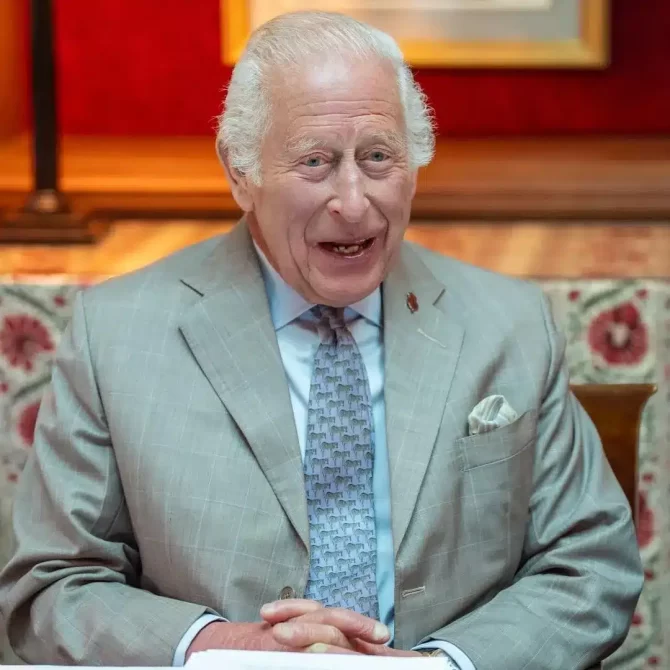
Sources reveal that King Charles‘s health is worsening while he struggles to perform his royal duties. The 75-year-old reportedly suspended his treatments for an 11-day visit to Australia and Samoa, where he met up with leaders and addressed angry citizens.
Charles was diagnosed with cancer in February, and although the specific type was not revealed, the tumor was discovered on admission for an enlarged prostate. This did not stop the King from working, as he resumed public service in April while ensuring the public a speedy recovery.
King Charles’ struggles with cancer reportedly getting worse
King Charles/Instagram
King Charles was clearly unwell during his recent trip, as he appeared frail and had one of his two accompanying physicians follow him with a medical bag. The black container reportedly had some of his blood in case of an emergency transfusion. There was also an ambulance following Charles’ motorcade through his visits.
His appearance also caused great concern as he had inflamed red lips and a pale complexion from chemotherapy sessions. The source added that King Charles has been neglecting his health lately, and was seen forcing smiles at the event line-ups in Australia and Samoa.
King Charles/Instagram
The Royal cancels his New Zealand tour
Accompanied by Camilla, Charles was present at different events including the dance at an Indigenous community center in Sydney, a BBQ lunch and a visit to Sydney Harbour to see the Navy fleets. The 75-year-old monarch did his best to participate by making gestures of approval during performances.
King Charles/Instagram
He ended up canceling his tour to New Zealand on doctor’s orders, as he is required to continue his treatments and get rest. The King still insists on more public appearances, and his courtiers are worried he might give up sooner than expected.
Next up: Reba McEntire Under Fire For Making Red-Themed Post Amid US Election
The post King Charles’ Health Takes Turn For The Worse As Cancer Battle Persists appeared first on DoYouRemember? - The Home of Nostalgia. Author, Peace A